Rails form, tutorial from the ground

Requirements
Tools used : Rails 6.1.3, Ruby 3
What is a form ?
A web form is not a Rails concept, a form is a way to send data to a server. There are many other ways to achieve this, but using the <form> tag means using a standard way to send data. It means excellent device support, excellent accessibility, browser support, and so on.
This works. Without Rails. Without any JavaScript. The browser itself is able to submit data to an(-other) URL.
So why is Rails needed anyway ?
At first glance we don’t need Rails to send any data to the server.
But, to avoid redundant, error-prone copy/pasting, Rails comes with helper that will generate the above form automagically, plus :
- authenticity_token for security reasons,
- consistent classes and ids,
- consistent “name” tags
- ability to disable the submit button once pressed (via JavaScript library named Rails-ujs)
- other goodies (see this article, for example).
Rails has helpers to build forms :
- form_for (softly deprecated)
- form_tag (softly deprecated)
- form_with (new standard)
You will probably encounter form_for and form_tag inside old gem or Rails projects, but form_with is now the new standard. So, for any new project, the only helper you have to care about is form_with.
Now let’s see how Rails take care of the simple form above :
1
2
3
4
5
6
7
8
9
10
11
12
13
<# This is what you write in your Rails template file #>
  <%= form_with scope: "book", url: "/books" do |form| %>
  <%= form.text_field :title %>
  <%= form.submit "Create" %>
<% end %>

<# This is the generated HTML you can view in your browser #>
<form class="new_book" id="new_book" action="/books" method="post">
  <input name="utf8" type="hidden" value="✓">
  <input type="hidden" name="authenticity_token" value="…">
  <input type="text" name="book[title]" id="book_title">
  <input type="submit" name="commit" value="Create" data-disable-with="Create">
</form>
Here is what you can notice from here :
- Rails “force” the encoding with a standard utf8, in order to decode your form field properly on server-side,
- The default REST method used is POST, (attribute
method="post"in the form tag) - There’s an hidden field with the authentication_token, for security reason
- The “name” and “id” of the text field are properly written for you,
- The submit field has a name (“commit”), in order to handle the case where there are multiple submit buttons,
- The submit field already has a “data-disable-with” that will be used by Rails-ujs to disable the submit button once pressed.
- Avoiding multiple submit is necessary, think about the case where your customer presses the button “pay”, this user probably doesn’t want to pay multiple times…
Using form without Rails helper is tedious and risky.
Tutorial from scratch
1
2
$> rails new myform --minimal
$> cd myform
inside app/controllers/welcome_controller.rb
1
2
3
4
5
6
7
8
9
10
11
12
13
class WelcomeController < ApplicationController

# welcome_path GET /welcome
# root_path GET /
def index
end

# update_book_path POST /welcome/update_book
def update_book
end

end
inside app/views/welcome/index.html.erb
1
2
3
4
5
6
<h1>Welcome ! This is a tutorial about Rails forms</h1>

<%= form_with scope: "book", url: update_book_path, method: :put do |form| %>
  <%= form.text_field :title %>
  <%= form.submit "Create" %>
<% end %>
inside config/routes.rb
1
2
3
4
5
6
Rails.application.routes.draw do
  get "/welcome", to: "welcome#index"
  put "/welcome/update_book", to: "welcome#update_book", as: 'update_book'

  root "welcome#index"
end
Now run
1
$> bin/rails server
And open your browser at http://localhost:3000

When you’re working with form in a Rails environment, I suggest always opening the Chrome dev tools console in order to see what’s going on in the DOM Tree.
Maybe you’ll see some surprises. Here, what we can see is :
Compared to part 1 of this tutorial, this Rails version handles UTF8 in another way. I don’t know if it’s related to the Rails or Rails-ujs version, but it’s kind of funny to notice. It doesn’t change anything for the developer, but again, managing forms without Rails helpers is a burden.
Notice the
method: :putinsideapp/views/welcome/index.html.erb. In order to match the VERB insideroutes.rb. Finally, thisputmethod is inside an hidden field of the form. Probably because most browsers only know how to GET data and POST data, but are unable to use other verbs like DELETE or PUT or PATCH.Everything else behaves as stated above.
Sending data to the server
Inside Chrome dev tools, open the Network tab. Then, type any name for a book inside the form, and submit the form by clicking the button.
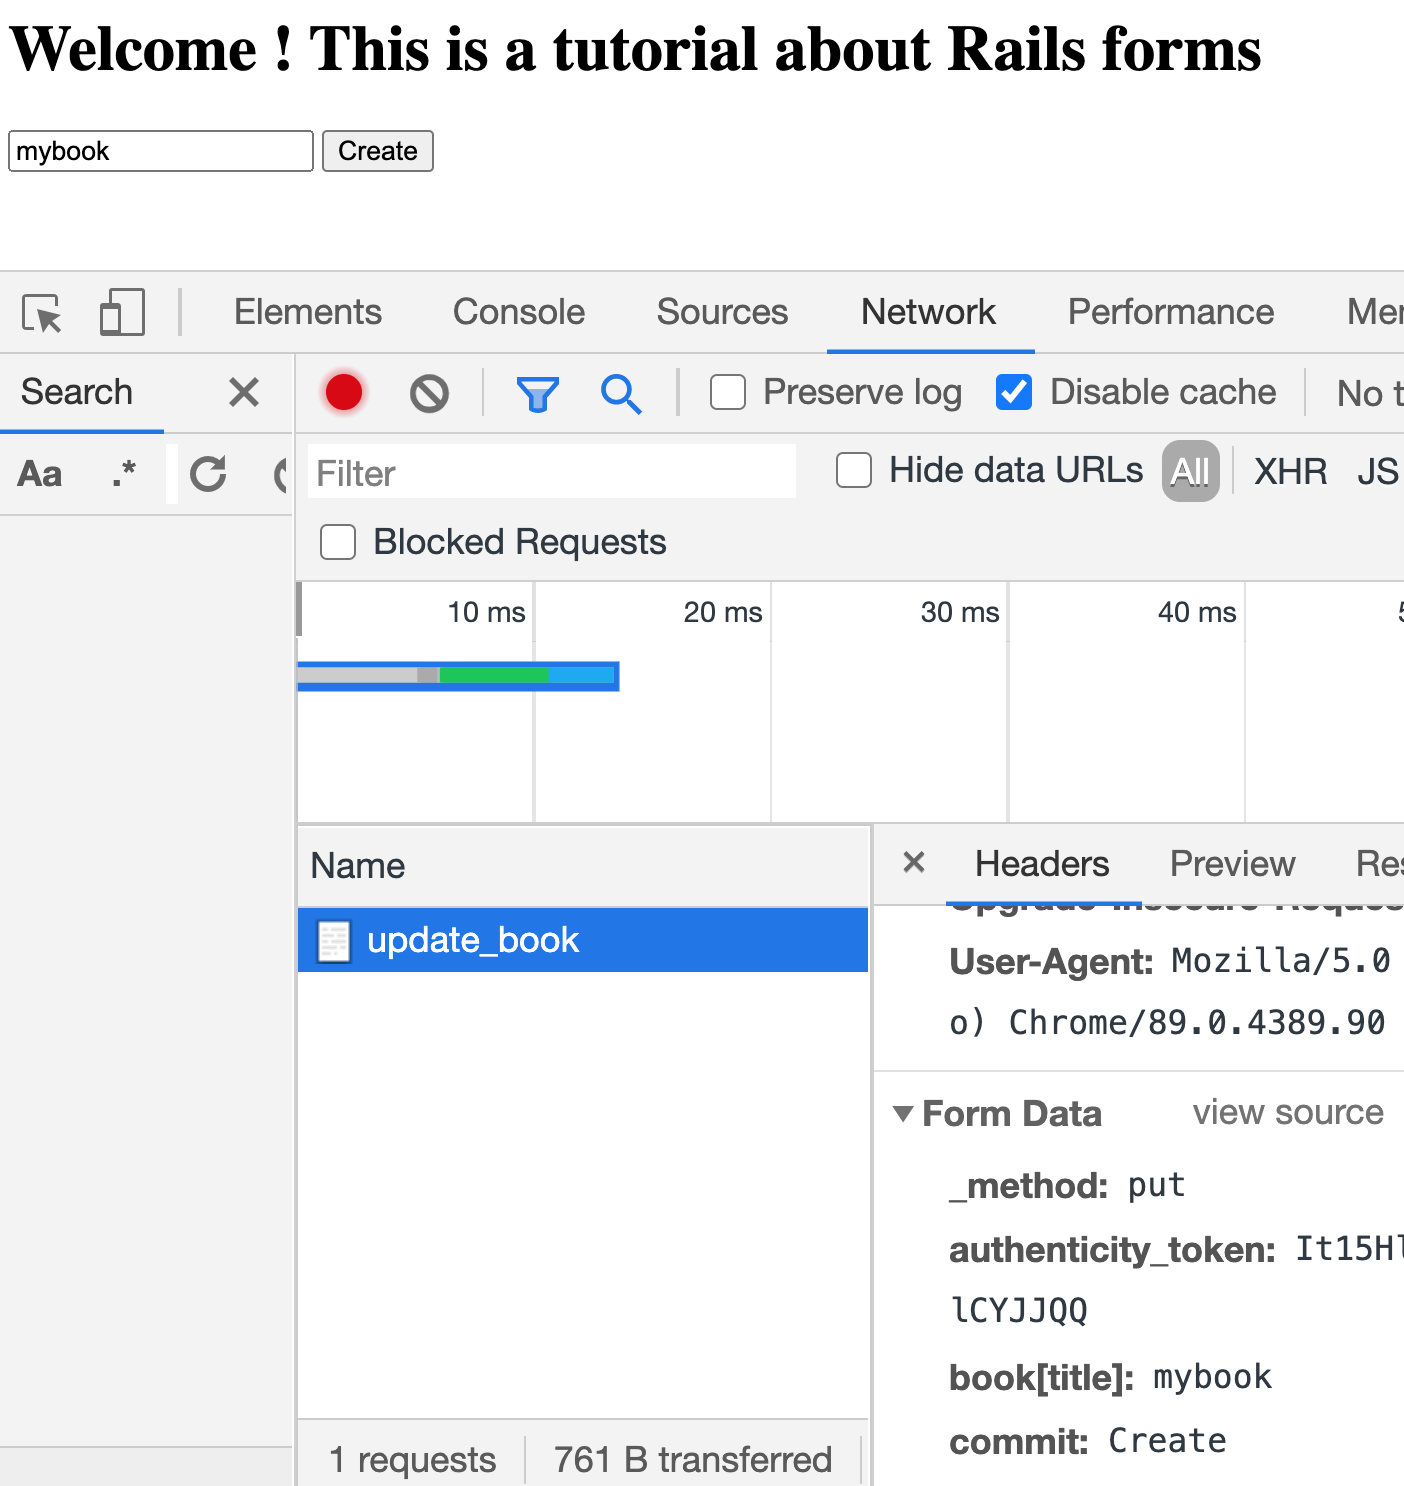
We can see that 4 parameters were sent to the server : _method, authenticity_token, book[title], commit
Now open your terminal :

There’s only 3 parameters, _method has disappeared, because Rails used it to calculate which method of which Controller was targeted.
So Rails already called the right method for us : WelcomeController#update_book.
And pass 3 parameters into the “params” object (that can be used by any method of the controller) :
- authenticity_token (I never had the use case)
- commit (in case we had multiple submit buttons, but that’s not our case)
- book (the useful payload)
Pre-fill the form with default values
The “Rails way” to pre-fill the form with value is to use a Model, which is an object mixed to the database.
If you already have some coding experience, that sounds wrong. Actually, many tutorials do not advise to do so. Instead, you use a plain Model, not mapped to the database, named “form object”. I will create a separate blog article about this soon, because this tutorial is already thick enough :)
By now you just have to know that it is possible to do so with Rails, and it brings even more magic (i.e. shorter code) to Rails form.
Unpacking data sent
inside app/controllers/welcome_controller.rb
1
2
3
4
5
6
7
8
9
10
11
12
13
14
15
16
17
18
19
20
class WelcomeController < ApplicationController

  # welcome_path GET /welcome
  # root_path GET /
  def index
  end

  # update_book_path POST /welcome/update_book
  def update_book
  p ''
  p '--- extracted params are ---'
  p book_params # will output {"title" => "gatsby"}
  p ''
  end

  def book_params
  params.require(:book).permit(:title).to_h
  end

end
Now put “gatsby” in the form and submit the button.
Here is what is printed inside the console.

As you can see, there is no magic here, this time. Worse, you have to deal with “strong parameters”, which are here for security reasons, but are somehow annoying because they add a lot of verbosity.
Conclusion
Whereas “web form” is a well-known, old, established web standard that has nothing to do with Rails, using it without any helpers is not advised in a Rails environment. Views and Controllers work together to ensure security, encoding, and routing.
“form_with” is the new unified standard. “form_tag” and “form_for” are deprecated - but kept for compatibility reasons.
Rails automagically maps field names according to the “scope:” key, another way is to inject a “form object” with the “model:” key, we will see how later on.
There is no magic in the other way : once the form is submitted, you have to extract, authorize and read parameters one by one in the controller before working on submitted data.